
Large image files can wreak havoc on your storage space. Change image dimensions and file size in a few steps to get the perfect image size for your needs.

Save time and space by resizing images.
Adobe Photoshop makes it simple to resize digital images by adjusting the pixel dimensions or image quality. Large photos or those with a high resolution — images with a greater number of pixels — can take a long time to download and require a large amount of space to store. When you want to send an image for someone to glance at or you need a photo to post on a digital platform, a lower-resolution image with a smaller file size is essential.

Explore the Image Size dialog box.
Adjust width and height or change an image’s resolution, measured by pixels per inch (PPI), by clicking Image › Image Size. This will permanently change the size of the image file.
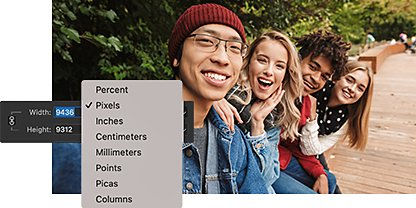
Choose your unit of measurement.
Change your unit of measurement by clicking the drop-down menu next to Width or Height. Choose from pixels, inches, centimeters, percent of the original size, and more.

Resize using the Export function.
To create a new, smaller file and keep the original size file intact, click File › Export As. Here, you can adjust pixels, scale down by percentage, or export as a JPEG with decreased quality.

Resize using the Export function.
To create a new, smaller file and keep the original size file intact, click File › Export As. Here, you can adjust pixels, scale down by percentage, or export as a JPEG with decreased quality.
How resolution relates to file size.
The higher the resolution, the more detail an image has, and the bigger an image file is — because it is more dense with data. One way to shrink a file size is to lower the resolution, which doesn’t have to change the image dimensions. If you keep the box checked to resample your image as you adjust image size, Photoshop will change the amount of pixel data inside the image. This shrinks the file size but keeps the dimensions — or document size — the same.

Consider the end goal for your image.
Different use cases require different image resolutions. For most web uses, 72 PPI is sufficient. However, a higher resolution around 300 PPI or higher is better for creating a high-quality print.

Understand resampling options.
Choose an interpolation method to specify how data is resampled in your image. It’s often best to go with automatic and let Photoshop choose for you, but Bicubic Sharper is a great option for reductions and Bicubic Smoother is good for enlargements.
Source: adobe
Comentários